The final result.
Ok so there were issues left and right when it came to finishing this house. The two biggest headaches were the kitchen cabinets and then the wood paneling that was throughout the house.
The kitchen cabinets took gallons of stain. Gallons. No matter how much stain was applied, a couple of hours drying and it looked as though nothing had been done.
The wood paneling in the house was a bigger problem. This stuff was in the living room, dining room, and the first bedroom and had been applied directly to the wall boards so removing it without pulling down all the walls was impossible. Instead I opted to simply paint over the walls. I wasn't sure how I felt about this option, but pulling down 3/4 of the interior walls wasn't a viable option when it would delay everything else. I was fairly happy with the final results.
We did discuss replacing the kitchen tile with something more modern, but I was a fan of the retro look we achieved with the updated cabinets and appliances. The one appliance we didn't replace was the fridge. While it doesn't match the other appliances, it was new so replacing it seemed excessive.
Despite turning the house into a rental property, I opted to spend the money on good flooring and carpet rather than the cheaper "rental" level flooring. This gave us a floor that will last through several tenants without needing to be replaced. While the majority of the house is "rental" white, we did have a little fun with the interior. The carpet in the bedrooms and living room is a dark blue, and the built in laundry cabinet was painted a pale green to break up the long white hallway. We installed heavy use tile in the entry way since that would get the most use, and while stainless steel is all the rage, I went with brushed nickel to minimize the amount of cleaning required - stainless is a real pain to keep clean. We also chopped the hedges around the house to open it up a little more and ended up replacing the garage door. And with the new windows, the A/C is capable of bringing the inside temp of the house down into the low 60's.
Monday, November 4, 2013


Renovation: Before (part 2)
So in 2009, my sister and I renovated my father's house.
I am going to clear up one misconception.
Renovating a house is not fun or as much fun as you might hope it would be. Don't fall for the Lowe's or Home Depot commercials with the happy couple, happily demolishing their home. It doesn't go that way. I grew up around major construction sites thanks to my family's engineering firm so I knew about delays, hidden costs, etc. and this still threw plenty of punches.
Ok I'm not going to explain every single picture because that would be excruciatingly detailed even for me, but I'll give you a quick run down.
This house, as you can tell by the light fixture, was built in the early 1950's by my grandparents.
They lived there until their passing and then it was handed over to my father until his untimely passing.
As you can see from some of the pictures, not much had changed in the house since it was first built. All the windows were single paned and leaked like a sieve. Despite the A/C going 24/7 - Southern California summer is a lousy time to renovate - it never dropped below 90 in the house.
We used to have massive get family dinners here so the cabinets were full of dishes.
My father loved two things in life aside from his family. Books and climbing. The picture with the through and through fireplace shows a sliver of what was in the front room. What you can't see are the massive bookshelves holding hundreds of books.
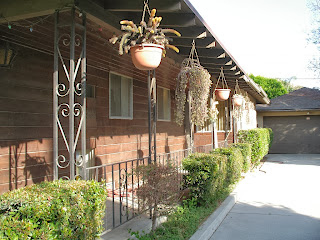
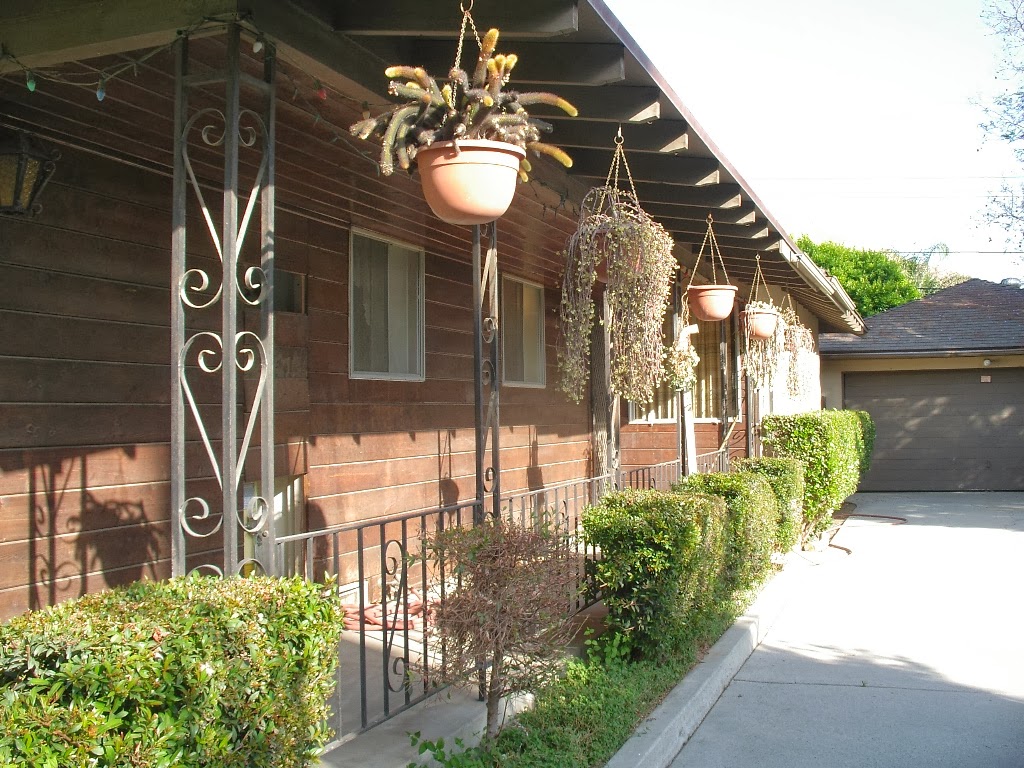
The outside of the house was mostly taken care of - lawn mowed and water, fruit trees in the back all healthy - but there was a lot of overgrowth that needed to go.
And the garage door wouldn't shut unless you slammed it.
Inside we had to replace just about everything you see from flooring to appliances, lighting, fans, etc. We also replaced the interior doors, something that sounded easy and ended up being a royal pain. What passed as "standard" in the 1950's is far from standard now so many items that sounded simple to replace, such as the doors, were in fact more difficult than needed.
Things to do:
* Clear down the house
* Deep clean house
* Replace all windows
* Bring electrical up to code
* New flooring
* Replace all fixtures
* New appliances
* Fix garage
* Re-plump house
* Clear down back yard
* Fix roof
* New gutters
* Paint house - interior and exterior
* New interior doors
* Mend fence
* Replace misc. items
* Repair interior walls
* Patch house against pests
* New roof insulation
A pretty standard list but each item had sub items. For example, new flooring meant removing the old flooring, replacing the padding, finding tile, laminate, and carpet, and installing. Replace misc. items means that every knob, pull, drawer handle, everything was replaced.
As you can see, this project is a lot bigger than it looks. This doesn't cover all the other tasks that had to be handled while the house was being worked out. That meant meetings with the lawyers, dealing with the estate, the other property, etc.
This was a large project.
I am going to clear up one misconception.
Renovating a house is not fun or as much fun as you might hope it would be. Don't fall for the Lowe's or Home Depot commercials with the happy couple, happily demolishing their home. It doesn't go that way. I grew up around major construction sites thanks to my family's engineering firm so I knew about delays, hidden costs, etc. and this still threw plenty of punches.
Ok I'm not going to explain every single picture because that would be excruciatingly detailed even for me, but I'll give you a quick run down.
This house, as you can tell by the light fixture, was built in the early 1950's by my grandparents.
They lived there until their passing and then it was handed over to my father until his untimely passing.
As you can see from some of the pictures, not much had changed in the house since it was first built. All the windows were single paned and leaked like a sieve. Despite the A/C going 24/7 - Southern California summer is a lousy time to renovate - it never dropped below 90 in the house.
We used to have massive get family dinners here so the cabinets were full of dishes.
My father loved two things in life aside from his family. Books and climbing. The picture with the through and through fireplace shows a sliver of what was in the front room. What you can't see are the massive bookshelves holding hundreds of books.
The outside of the house was mostly taken care of - lawn mowed and water, fruit trees in the back all healthy - but there was a lot of overgrowth that needed to go.
And the garage door wouldn't shut unless you slammed it.
Inside we had to replace just about everything you see from flooring to appliances, lighting, fans, etc. We also replaced the interior doors, something that sounded easy and ended up being a royal pain. What passed as "standard" in the 1950's is far from standard now so many items that sounded simple to replace, such as the doors, were in fact more difficult than needed.
Things to do:
* Clear down the house
* Deep clean house
* Replace all windows
* Bring electrical up to code
* New flooring
* Replace all fixtures
* New appliances
* Fix garage
* Re-plump house
* Clear down back yard
* Fix roof
* New gutters
* Paint house - interior and exterior
* New interior doors
* Mend fence
* Replace misc. items
* Repair interior walls
* Patch house against pests
* New roof insulation
A pretty standard list but each item had sub items. For example, new flooring meant removing the old flooring, replacing the padding, finding tile, laminate, and carpet, and installing. Replace misc. items means that every knob, pull, drawer handle, everything was replaced.
As you can see, this project is a lot bigger than it looks. This doesn't cover all the other tasks that had to be handled while the house was being worked out. That meant meetings with the lawyers, dealing with the estate, the other property, etc.
This was a large project.
Sunday, November 3, 2013
Renovation: Before (part 1)
I realize that I have neglected this blog, and so I plan to try and remedy that situation with this post.
This will be a large post that I have broken up into several posts. This post will be nothing but pictures. The next post will explain each of the pictures and give background.


This will be a large post that I have broken up into several posts. This post will be nothing but pictures. The next post will explain each of the pictures and give background.


Sunday, June 2, 2013
What's this?
A new post? Will this madness never end?
This weekend, we decided that it was time to sell my old truck, the Chevy S-10 that got me through the latter part of college, a move to San Francisco, plus many trips to Portland from San Francisco, a move to Seattle, with many trips to Portland, and a couple of years after before I purchased my current vehicle. She's been well loved, well taken care of, but still shows wear and tear.
We fixed the doors last weekend - a tedious project, and moved onto the interior.
Here's the interior of the truck, the seats, carpet, and some wiring removed.
The old interior. As you can see, it's had better days.
The new interior installed, trimmed up, and ready to go.
Almost done. A quick cleaning with the vacuum and it's finished.
And the leftovers plus the old interior.
This project, while considerably more time consuming than the doors project, was actually much easier. The doors still aren't completely done due to some disagreement between me, and the instructions provided - the internet didn't provide much help either.
So the S-10 project marches on. I suppose you're wondering if this is a project I will actually finish - the bed frame still isn't stained, and I've had to start over on the trophy blades -but since I've been getting calls on the truck, it's something that will have to be done. The remaining projects are numerous, but small - replace a couple of handles, fix the remaining door, deep clean, check the fuel system - and she should be in ship shape come late July.
Sunday, February 10, 2013
My new rule

Anyhow, my rule, newish rule is, "Try to never buy what you can make." That covers many different avenues, one of which happens to be coaching tools.
And why not? Coaching tools are expensive. Very expensive. And I believe that you get what you pay for - mostly. So if you spend a little, you're going to get a little. Pitch meters alone can cost upwards of $40 dollars. A pitch meter? The rigging tools I desperately want? Almost $200. Each. Ow.
Last time we chatted, I was in the process of building a height stick similar to the one found on a certain website. That project? Highly successful. Cheaper? Well, once you figure in the cost, plus shipping, yes, but not by a wide margin. Satisfying? Absolutely. So while you could order one, I prefer to build my own. And the bonus of it is, there's a rigging issue that seems to spring up every time I've used an "original" one of these that has been eliminated by me building my own. No more guess work which means while the cost difference was about $10 dollars - that helps these days - the headache issue has been completely negated. Win win.
The latest thing that we've built: A sit and reach box. With some help, I've built one that we'll be using later on this season. Again, ordering, not an issue, but why order when you can built it? Check out the link, and you'll understand why. And while the one you can build isn't as fancy as the ones you can buy - though I can make one that will have the sliding scale on it - at $17 dollars for the pieces needed, I can build 9 of them for the price of the cheapest version.
Granted, building or making all of your coaching tools isn't feasible, so you'll need to do some research. I won't make my own measuring tape because that's just silly though I may alter one that I buy. I won't build my own tool box because I'll never build one light enough and strong enough - mostly light enough - to rival what I can buy - and who has the machinery necessary to do all the bending and cutting right?
But I will say that if you sit down, take the time to do some research, you will find that you can produce what you need at home - still talking tools of the trade here though you can see what I'm getting at - for a fraction of the cost to buy it.
Subscribe to:
Posts (Atom)