Pages

Thursday, August 7, 2014

How long has it been?

As you can see, quite a blow out.
Summer seems to be the time that projects get done around here, and this summer is no exception despite my being in grad school.  This year the washing machine decided that it'd had enough and blew up.  The center tower had rusted out, and that was that.  And since we had to replace the washing machine, why not remodel the laundry room while we're at it?

This means new paint, new fixtures, new hanging cabinets, new floor, and of course, a new washing machine.

It's a rather straightforward sounding project, and we have a majority of the items on hand including the paint and the tile so with a week before the arrival of the new machine, we should be able to get the whole project completed.


The first things first, everything in the room comes out including the toilet, the shelving, old cabinets, and the shop sink.  

Next we strip the walls because we're going to paint and put up a new tile base along with the flooring.  And despite the previous owners not being solid in repair and upkeep, we are pleasantly surprised and relieved that they used greenboard in the room.  This will make life easier.


More prep work with the two machines being removed.  The big white spot was where the previous owners decided to paint around the old toilet rather than remove it to do the job correctly.  And the water hookup is quite low, so now is also a great time to move it to a more reasonable height.


A better shot of what I'm talking about above.  That outlet on the left is pressed up against the toilet which means to run water to it, we had to run to the outlets on the right with a flexible hose.  It works, but it's about as low rent as you can get.  Some drywall and plumbing work and we can make that outlet useable.


This picture was from several days later, as we prepped the room for painting.  What's transpired in between was the moving of the outlet (see above), and setting the insulation in the wall on fire.  The builders installed it backward, and while we were cutting the pipes in the walls, a spark set the paper on fire.  It was quite exciting putting it out, and that is why you should always have a fire extinguisher handy at all times.  But that excitement aside, the plumbing went quickly and we even managed to remove a massive clog.  I have my suspicions that the previous owners were heavily involved in some nefarious schemes including "cooking" based on what the clog was made of.  I believe you get my drift there.


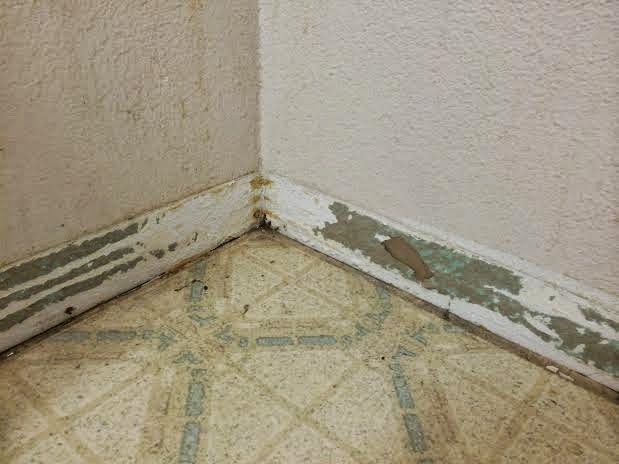
Well it wouldn't be a Stark project without some sort of hiccup, and this project has had plenty.  We had to replace two tools - a dual action sander, and tile saw - and then just as we were prepping the floor for tiling, we noticed that it was peeling.  No big deal, we can just pull it back and cut it and is that black mold?

The previous owners hadn't installed the old toilet correctly, nor did they know how to install a floor.  So the toilet leaked terribly, and to counteract this, they used gallon upon gallon of glue to try and create a barrier with the old flooring.  As you can see, this doesn't work.  But it does make tearing up the old floor incredibly difficult.

This is where things stand now.  Luckily the black mold looks worse than it actually is, and we've done a great job cleaning it up.  It's nearly gone so we'll be able to install the new floor this weekend.  The room is also completely painted so all we're waiting on is the flooring and we can start putting the place back together.  And not a moment too soon since we've had to have the house opened up for ventilation, a wonderful thing when it's been 90+ outside.  I'm done with trying to go to sleep in a house that's hovering around 85.

Sunday, February 23, 2014

Still working

This project is not as easy as it would appear, though I will admit that when it comes to anything sewing related, I'm not even a novice. 

Problem 1:  Weaving the elastic.  It's a pain.  A serious pain.  Even when you've pinned down the edges and had them sewn it's not easy.

Problem 2:  Sewing the elastic.  It goes all over and even the person who helped me get the edges down had some trouble.  I solved this by using double stick tape cut in half.  I put down the tape, then applied the pieces so they stayed in relative order.  There's still a couple trouble spots, but I'm not nit picking.

Problem 3:  Stretching the elastic tight.  I resolved to use a clip board to do this.  What's the problem?  Well the backing that you're attaching the elastic to isn't exactly firm so when you pull it has a tendency to want to come with the pull.  I solved this by using a clip board and clipping down the edge I'm pulling against, then pinning the opposite edge, then sewing it up - by hand because the board gets in the way of the machine.  The results were pretty good.

Problem 4:  This was my problem, but one that you should avoid.  Use black as your backing.  I went with gray and the foam I used is showing stress mark where the foam got mangled or scratched.  Issue?  Only cosmetically.  If you care about that, use black. 

This project I figured you could knock out in two days, a day if you're really good with the machine and you don't have interruptions.  I tend to take longer on projects because I break them up, or walk away when I run into an issue rather than sit there and get frustrated.  So I'm still working, but I can see this coming together.

Will I do this project again?  Hard to say.  I think it's going to look nice, and I can tell you that the money spent is less than it would cost me to get a similar professionally made item.  I might do it again, but I think that there needs to be some modifications done.  The weaving isn't as fun as it sounds, and being the first, there's a lot of trial and error.  We'll see. 

Tuesday, February 18, 2014

The next project follow up

I've been dealt a temporary setback.  First off, I don't know how to use a sewing machine.  Secondly, the sewing machine I was going to use under careful supervision gave up the ghost as I was in the process of doing a test run.  Currently I'm waiting to hear back from a friend about the availability of her mother's machine and possible help.

But aside from that, let me catch you up.  If you haven't taken a look at the project page, here's the link again.  Rather clever if you ask me.

Securing the needed materials - until this sewing machine issue - was the biggest problem.  I went through four different thrift stores looking for a book that suited my needs.  I decided to stick with the older books for two reasons.  The first is that I like the covers better than what we have on the newer hardbound books.  Secondly, I surmised that older books would be well used books and the spines would be separated from the binding.  This proved correct.

If successful, I plan on making a second one of these so when I found some rather academic looking books that suited my needs, I grabbed all of them.  For the price of $11 dollars and some odd looks from the cashier, I am now set to do at least two.  I'm rather attached to the old engineering guide that I picked up.

Forget fabric stores.  I went, I looked, I went to Michaels and that's where I recommend you go for your materials.

I opted for heavy paper - think 4x the thickness of poster board and much stiffer.  For a second version, I think I'll spend the money - $13 rather than $7 - and get heavy matting.  The book I chose is still in good condition, but I think I'd like the extra sturdy feel of picture matting.

You will need the 9 yards of elastic.  I went with the 0.5 inch strands and have used all but some scrapes.  I also went with the neoprene backing because that was readily available.  I chose grey because I liked the look better than black on black.  They had some extra fun colors - orange and red - which I might use for the second book.  You can see the neoprene behind the elastic when done so that might be fun.


As you can see here, I've marked out the areas with what I'm going to put where.  The original has a large pocket on the right.  I'm debating doing this, or weaving in some elastic for pens or other things.  I'm going to put the iPod at the top - she put her cell phone there - and then straight elastic on the left.

The book I chose was slightly smaller than the one she used so I don't think I'll be able to get my laptop charger inside.  I don't think I'd want to in any case because of how much space that would take up.  Instead I'm opting to corral the cords I have in my bag - iPod charger, phone charger plus extention, HDMI cable - and a flash drive and ear buds.


This is where I am right now.  I've cut the lengths I need and then attached the long pieces with pins.  And then the sewing machine mishap happened, so now we're in a holding pattern.  But things are coming along nicely, and it's a project you can probably knock out in a day, maybe two.

I don't have any recommendations as of now.  I would say that you should error on the side of a book at least as large as the original if not slightly larger.  Also take into consideration the thickness of the book, and what you plan on putting inside.  One reason I chose to skip using the engineering book aside from liking it - a very clean book considering it was published in 1939 - is that it's only about 1.5" thick which can be limiting on what I can put inside if I plan on using both sides - and I do.  I would caution about using too thick of a book.  I saw an old dictionary that looked useful but the thickness - at least 3.5" - was a turn off.  Remember this should fit in a bag.

Well that's it for now.  Everything is set up and ready to go, so as soon as I hear back about a machine, we'll be off and running again.

Sunday, February 16, 2014

The next project

This will be the next project, and I've already started.  I've been sick the last couple of days, so this seems like a perfect opportunity to attempt this.  I was very picky about the books that I chose, and I got lucky and found a well loved college text book from 1947 in a bargain bin at a local thrift shop.  I managed to get three for under $12 so if one fails, I have two back ups.

I might post pictures as I go.  We'll see what happens.