Pages

Thursday, April 9, 2020

Banana Bread

It has been a very long time since I last posted here, but with the Covid-19 going on and everyone social distancing, now is a good time to break the silence and share a recipe.


Now, I do not claim to have come up with this recipe, but I have modified it a bit over the years till it's something that I like. 

The original recipe calls for mashing some bananas so you still have some texture in the bread.  I am not a fan of that because you end up with these interesting bits of banana that aren't quite banana, but aren't much of anything else.  So I skip that step.  I suppose if you wanted that sort of look you could fold in some banana chips or freeze dried banana, but I feel that the chocolate chips and nuts do enough. 

Another thing that I don't do with this recipe - which I usually do for baking - is measure by weight.  This is the old scoop and sift method which works well enough.  The flour is the only measure that can throw you, so I recommend you fluff the flour up so it's not packed in, then scoop and sweep.  And always, always, always sift your dry ingredients. 

Banana bread
4 C flour
2 C sugar
Pinch kosher salt
Cinnamon (dash)
Ground Clove (less than a dash)
Nutmeg (dash)
4 eggs (room temp or warmed)
3 sticks unsalted butter (melted)
3 TSP baking soda
6 over ripe bananas
Walnuts (chopped)
Dark Chocolate Chips
Powdered Sugar
2 TSP Vanilla (I usually go 4 because I like vanilla)

- Preheat the oven to 350 degrees.
- Butter three bread pans and dust with powdered sugar.
-Sift flour, salt, and baking soda.
- Cream bananas and sugar till smooth.
-Drizzle butter into the banana cream.
- Add eggs, vanilla, cinnamon, clove, and nutmeg.
- Add dry to the wet and mix gently.  You can sift the dry into the wet if you'd like.
- Dust chocolate and nuts with a tiny bit of flour.
- Fold in chocolate and nuts.
- Pour batter into the bread pans.
- Bake for 40' then rotate 180 and back for 20-35 minutes longer.

Total bake time will depend on your oven.  I begin checking the center of each pan 20' after rotating.  Most recipes will tell you to pull once a knife or toothpick comes out clean, but I always pull when there is a tiny bit of wetness left at the tip.  The reason for this is because the bread and pan is hot and will continue to cook as it cools.  I will sometimes kill the heat after 20 minutes and allow the bread to gently coast to the finish. 

Saturday, July 6, 2019

Cooking, the other passion

It's been a long while since I last posted here mostly because I tend to forget that I have this second page, and because it's been a long while since I last did a project.  I tend to want to wait till I'm doing something crafty before posting, and perhaps that should change.

I don't have pictures for this post, so you'll need to use your imagination on this.

Cooking.  It's my greatest passion, even over coaching.  And you might be asking yourself why I did not head off to culinary school if I love it more than coaching, and that is because I love it more than coaching.

I've considered culinary school.  I looked into the CIA in upstate NY, and I've looked at a couple of local schools in the Portland area.  However, I have two issues with going to school.

1.  I know my age, and it's a bit late to get into the culinary arts.  I'm not going to want to go intern at the great restaurants in Europe or anywhere in the states.  I'm going to want to get after it.
2.  I know myself, and I know that while I don't want to do any of the above, I would want to because I'd want to start chasing those stars. 

With that being said, I have strongly considered starting a small food truck, and done the research for it, and even developed a menu. 

We'll see where that goes.

As for cooking in general, I'm fairly opinionated on things as I am with coaching, and I thought for this post I would share some of my favorites.

1.  Only cook with wines you would drink:  I consider this to be quasi true, but determined by recipe and or dish.  The idea behind this saying is that cheaper wines tend to taste, cheaper.  In theory that is true, but I say you drink whatever you like, and that I've had some rather boring expensive wines, and some rather exciting - in a good way - cheaper wines. 

So here's my suggestions. 
1.  What are you cooking?  If it's a stew or a dish with many flavors, and a long cooking time, go cheaper.  If it's a sauce, or a dish where the flavor of the wine will shine through, go a little more expensive.
2.  Never spend more than $20 on a bottle.  Beyond that, and I simply want to drink it, not cook with it. 
3.  Never underestimate the value of the French saying, "Only the first bottle is expensive."  I think the French say that.  It sounds French.  Anyhow, let's say you're making a sauce that has some cooking time, a few ingredients, but you feel that the wine is there for the body more than flavor.  But you still want the wine to be noticeable.  I'd use a cheaper wine, then with five minutes before the sauce is finished, drizzle in some fresh, more expensive wine, and stir in.  This isn't a bad idea with many dishes where alcohol is involved - French Onion soup with some cognac to finish is life changing.

2.  More expensive tools are better:  My favorite whisk is a cheap balloon whisk purchased from Target.  It's durable - I've had it for nearly seven years - and it makes great sauces.  It's strong enough to retain its shape, but light which means that I could, in theory, whisk egg whites to stiff peaks if I wanted without wearing out my arm. 

I love wooden spoons.  Durable, easy to clean, cheap.  I also love those rubber spatulas that you can find at a BOGO sale. 

There are a few places I will splurge on.  My kitchen knives are expensive as is my steel, and sharpening blocks.  So are my kitchen shears, box grater, blender, and peeler. 

3.  You need many oils:  I have two.  Sometimes three depending on what I'm doing, but two suits me fine.  Have you noticed in cookbooks, and cooking shows that they'd like you to purchase several oils, all expensive?  Have you noticed how most of those oils go unused, turn rancid, and get tossed?  Have you wondered if you really need to purchase walnut oil for a single salad dish?

I have extra virgin olive oil, usually the California Olive Ranch brand, and then a high smoke oil like grapeseed or avocado.  That's it.  The olive oil is my multi purpose oil for dressings, and lower temp cooking, and grapeseed oil for sauteing. 

I will only buy specialty oils as needed, and never keep them on hand.  I tend to forget them, and then I find them months later. 

I will not buy flavored oils from the market.  Garlic, lemon, chili, almost any oil can be made at home relatively cheaply, and quickly. 

4.  Fresh ground pepper:  It depends.  Usually, yes.  However, there are times when freshly ground pepper has too much of a punch.  I got this tip from Aaron Franklin and I like it.  There are times when you want some of the heat, and punch, but without that fresh cracked taste.  I grind up peppercorns, and then allow them to chill for about 10 days before sealing in a canister. 

Also, I'm picky with the type of pepper to use.  For example, I do not like black pepper in hollandaise.  White pepper only. 

5.  Sea salt:  I do not like sea salt as a primary salt.  It's too salty.  It packs too much punch.  I prefer kosher salt from Morton's. 

I will use large flake sea salt as a finisher to a dish, but not as a seasoning.  I feel the same about many specialty salts.  I believe this comes down to knowing your audience.  I'm all for fancy dinners for friends - I made smoked tomato consomme last summer for a friend with a corn and smoked salmon relish - but finishing salts, to me, are a way to spend an extra $15-20 that you could either put toward better ingredients, or even splurge on a better wine.

6.  Microwaves:  Are our friends.  I hate it when Chipotle, and other restaurants say that they don't use microwaves.  Thomas Keller uses a microwave in his kitchen.  Chipotle will never be mistaken for Thomas Keller.  If Thomas Keller can use a microwave, you can use a microwave. 

The same goes for cans.  If you want to tell me that you always have soaked black beans on hand, or fresh green beans that you've rotated religiously sitting in your fridge/freezer, then your kitchen is larger than mine, and we should be friends.  I use canned beans, and such all the time when making soups.  I buy low sodium, and call it a day.

7.  Learn tricks:  I love tricks.  I love making spaghetti sauce taste like it's cooked for hours rather than 40 minutes.  I like making chicken stock have the same sort of lip smacking flavor as homemade chicken stock.

Cheats depend on what I'm cooking, but it usually comes down to a technique.  Usually.  Extra deglazing by building fond, sometimes tipping in something store bought to give a bit more depth - Ramen seasoning packets do wonders for plain jane stock, as does adding a scoop of "Better than Bouillon." 

We'll wrap the tips there.  These are tips or tricks that I use.  I won't swear that they are something a chef would use, but I am not a chef, just someone who loves cooking. 

Monday, June 12, 2017

Let there be light

I'm going to admit a few things.

1.  I got the general design from some images I saw on a Google search for, "Pipe floor lamps.

2.  I'm feeling extremely lazy so rather than upload the individual pictures I took, I'm going to stick with this collection I made for Instagram.

3.  While this took only two days to design, and build, the project has been sitting on my, "to do" list for over a year.

4.  This isn't the lamp design that I wanted, but I decided it was something I could live with.

So I built a lamp.


To do this project you're going to need the following.
1.  One 48" piece of steel pipe.
2.  One 36" piece of steel pipe.
3.  Three 90 degree elbows.
4.  One union.
5.  One floor flange.
6.  One nipple.
7.  One tee.
8.  One heavy duty switch.
9.  One cord with single socket - I went with a 15' cord from IKEA.
10.  Two PVC caps.
11.  Black spray paint.
12.  Various electrical pieces for switch box.
13.  Lamp shade.
14.  One union.

I'll get to the support in a second.  I'm not happy with the design, but it works until I can figure out something else.

I went with all 3/4" pieces, black, but feel free to go with whatever size pipe you like.  I would recommend at least 1/2", with 3/4 being preferred if you plan on threading the light cord through the arm, but it's up to you.

I found everything at Home Depot, except for the electrical cord, which I picked up in the "Bargain" area at IKEA.  I went with 15' because it's what they had, and because it gave me a lot of flexibility for the overall design, and would allow me to play with the length without feeling constrained.  The overall length is good, and will allow me to move the finished lamp around without worrying about needing an extension.

Something to consider:  The steel pipe I used here will rust if it gets water on it.  I'm ok with that because I'm going for the industrial look, and because the lamp will be inside only.  It's something to consider if you're planning using your lamp in the shower.

Step 1:  Have someone at HD cut the 36" pipe into a 2 ft and 1ft section, and then cut threads on them.

Step 2:  I began at the base and worked up.  I drilled four holes for the floor flange, tapped them so the bolts would be flush, and screwed them together.  I then added the 48" pipe, threading it into the flange.

I'm not a fan of the base I used, but when I was designing the lamp, I wasn't entirely certain how top heavy it would be.  I bought a wooden crate from HD, and a bag of large river rock from their clearance section.  I'll be switching this out in the future, but it works for now.

Step 3:  I suggest you use gloves, and a pipe wrench for this next part.  I assembled the three elbows in a rough square.  You can get a general idea in the lower right picture above.

Step 4:  Attach the union to the elbow, and then attach the nipple.  I recommend you use the wrench to tighten down everything as much as possible, keeping in mind the angle and direction you'd like with the lamp.  The union will make life very easy - you'll see in a second.

Step 5:  Attach the tee to the nipple, and tighten down.

This is where the union comes into play.  With everything tight, you'd have a difficult time adjusting the angle, and height of the arm - comes next.  The union allows you to loosen the fitting, and adjust the angle and height without fiddling around with the elbows or tee.  Then you simply tighten the union down using a pipe wrench.  This also allows to you take the lamp apart for easy moving.

Step 6:  Attach the 1' and 2' pipes to either end of the tee.

Step 7:  Drill a hole in the top of both PVC caps large enough to thread the electrical cord through.  Clean thoroughly, lightly sand, then spray paint black.  Allow to dry overnight.

Step 8:  While the paint is drying, measure the cord to the length you'd like, including how much you'd like the globe to hang, and cut the cord.  Prep the wires, but do not attach the switch box yet.

Step 9:  24 hours later, thread the cord through the first PVC cap, and down the arm.  I used a long dowel for this, but whatever you have on hand will work.  Once the cord appears out the other end, thread it through the second PVC cap.  Hand tighten both caps.

Step 10:  Attach switch box.  I'm not great with electrical wiring, but this was fairly simple to do.  Make sure you use the instructions if you're unsure.

Step 11:  Test the cord.

Step 12:  Place the lamp wherever you'd like.  Mine is going into my bedroom to hang over the bed.

Step 13:  You can skip this step depending on the stand you used.  Because I'm using the wooden crate, I put a single layer of large river rock in the bottom of the crate for stability.

Step 14:  Attach the shade to the cord, and add bulb.  I'm going with an LED which gives off a lot of light for a single bulb.  Not great for night, but perfect for the day.

Final product.  You can see how the bulb and shade hang.  

So I told you that this isn't the lamp design that I wanted.  Eventually I plan on doing the first lamp that I liked, but until I figure out a few things, I wanted to put the pieces together into something useable.  And I do like this lamp. 

Here is a link to the YouTube video of the first lamp I wanted to build.

All told the project came out to just over $100 dollars including the cord.  It's a bit much for a general floor lamp, but it's very reasonable if you're looking for a lamp in a similar style - industrial with the pipes.  Lamps Plus had one that was along the same lines for $239 dollars so I'm happy with the end result.

Thursday, June 1, 2017

RV Life

First let me say that I am not a fan of tiny houses, or the fad.  I think some of the designs are interesting, and I don't believe you need a house much larger than...7500 square feet, and you certainly don't need more than five bedrooms or bathrooms, but I'm not about to downsize into a 300 square foot house for long term.

That being said, short term - anywhere from 1 to 5 years - is more in my line of thought.  And so with that, I introduce my travel trailer.  

Why
Housing is expensive.  Housing is limited.  And when you're a coach on the move, surviving paycheck to paycheck on part time pay, you take every opportunity you can seize upon to stretch the dollar.  This is a 2016 FR Vibe - more on this in a few - that has an overall length of 26 feet, and a living length of 23.6 feet.  It also has cathedral ceilings - curved - a single slide, bathroom, etc.  

When I graduated from the UW IAL masters program, I'd received an offer to return to Oregon State as a volunteer coach.  Having interned the year before, I knew how much work that would mean, and I wanted to immerse myself as much as possible.  This meant that outside work would be severely limited.  Rent in Corvallis is not cheap.  The 2-bedroom apartment I shared while interning through grad school ran nearly $700-750 a month including utilities, not including food, bills, etc.  Single bedrooms in the same complex had jumped to just over $1000 a month.  I found a nice RV park in Albany with concrete pads, two laundry facilities, propane, cable, and internet for $450+ electricity, so that combined with my low monthly payment on the trailer came to just over $600 a month.  Done deal.

The Trailer
If I'd known more about trailers then, I wouldn't have bought this trailer.  It's not a terrible trailer, but it has major drawbacks, and for a company that claims it's a "four season" trailer, and for a company located in Oregon, there are some seriously questionable design flaws.  I won't get into them here because the company likes to scan the internet for people who complain about their products, and then call them out - dealt with that already - so let's say that if you're in the market for a trailer, and you decide to go with the company that makes this trailer, Godspeed to you.

The redesign
After getting all of the issues with the trailer fixed, or as many issues fixed as possible, I decided it was time to redesign parts of the trailer to better suit my needs.  And that's what you're seeing below.  

The mattress isn't so much a mattress as it's two pieces of cloth wrapped around cotton.  This isn't a big deal because most trailers come with terrible beds to start with the idea that you will replace them.  I haven't yet because there are other priorities.  But I did by a 3" piece of foam that helps.

The table wasn't working.  The seating wasn't built correctly - zero supports underneath the thin piece of finish paneling, so that was ripped out and replaced - thank you warranty.  All trailers have a serious lack of storage, and while this trailer does have a surprising amount, I decided to purchase three of those cheap bookcases from Fred Meyer, and use them as places to store tools, extra shoes, cooking things, etc.  They are designed to fit those fabric bins which helps keep the clutter down to a minimum.  

I used the top of a desk that I'd found cheap at IKEA for grad school, and pulled out the table supports to make a flush floor for my chair.  In a fortuitous turn of events, the bookcases, plus the old seats made for the perfect height for a standing desk.  I'd like to say I planned it this way, but it was by sheer luck. 

The stove will be the next part to go.  I'm hard up on this because I love cooking over gas.  Propane heats quickly, and more efficiently than electric does.  However, the oven is a bit of a pain.  It doesn't heat up evenly - yes, I realize it's a glorified camp oven - so I rarely use it, and it's simply taking up space.  I plan to pull the unit out, and replace it with either a drop in, or counter top 2-burner induction cooktop.  This will give me extra storage space for pots and pans where the oven used to be.

I also plan on replacing the shower.  The shower that came with wasn't a good shower, with a poor tub floor.  I don't want to get ambitious, but I do want the shower to be more user friendly than it was.  I've yet to decide if I want to replace the surround, but I yanked out the glass doors, saving the glass, but losing the metal frame in the process - no great loss - and am now contemplating how I want to rebuild it.  I believe I'm going to remove the entire pan, and put down something different from Home Depot.  I'll also install the two pieces of glass I saved as walls to protect the vanity and toilet, and then use tiles to replace the cheap plastic surround.  Or I'll leave the surround, and simply replace the pan.  Options aplenty.

The final thing that needs to be done with the trailer is to cram as much extra insulation as possible into all the nooks and crannies.  The bathroom has a large wardrobe so I'll line the walls with some extra insulation, and do the same under the kitchen counters, the back of the pantry, and under the new desk, as well as under the bed, and in the outdoor kitchen that pulls out.  

All in all am I happy with my purchase?  It's a 6/10, but I'm working to improve it.  If I'd know now what I figured out over last winter, I'd say no, and I'd go with something else.  But the trailer is solid enough, and working on it, and improving/remodeling it to be exactly what I need it to be will help.  Resale isn't something I'm overly concerned with.  The improvements I'm making will only increase it's appeal, and the original kitchen table, and cushions were saved so they can be reinstalled quickly.  

2016 Vibe - Do NOT buy this trailer, or from this manufacturer  
Bedroom
Remodeled the dining room 

Main table replaced with bookshelves and desk top

Propane oven/cooktop to be replaced

Replacing the shower 

Friday, September 23, 2016

Lightbox part 2

It's been well over two years since I last posted here, and part of that reason is that I haven't had many projects to do.  Coaching takes up a large part of my time, and when I'm not coaching, I'm usually thinking about it, and then I'm coaching again either through video review, note review, data review, etc.

Basically it's a lie that I have a life outside of coaching.  I have brief pit stops outside of coaching.

This is one of those pitstops.

What is a lightbox?  This is a lightbox.  I think these have something to do with photography, and drawing.  I know that you can use them to make it easier to trace a picture, and that they can backlight objects, but being neither photographer, or solid artist, I have no idea.

But I do like the idea of having a lightbox.

So I sort of built one.  I played with the idea of gathering up the materials needed to make one from scratch, but I began running into a few hiccups.

First, the weather.  It's been cold and rainy, which means working inside of the shop that I don't have with the power tools I own, but have no space to set up.

Second, the glass.  I could find it, but that would mean finding the glass before building the box.

Third, as with many of my projects - the headboard - once I start a project, the chances that it gets finished if it's very involved vary, but usually they don't.  The headboard is done, but once I realized the amount of time required to sand, and stain the entire piece, I quickly lost interest.  And when I discovered that IKEA does have doors, and that modifying an existing door or window shutters was more cost effective and easier than building a door or window shutter, the project was canned.

So knowing my love of starting things, and love of leaving them when I move onto something else, I decided to take advantage of a ridiculous sale at Michaels and buy one of their large shadow boxes.  Finished, hinged, with a removeable back, it was perfect.

The link I posted used paper to create the ghosted effect, but I decided I didn't want to buy tracing paper, so instead I opted for a can of frosted glass spray paint.

The final piece was finding LED light strips on Amazon.  These things are amazing.  They have an adhesive back, and you can cut them at various points.  Just be sure to buy the set with the power adapter.  I neglected to do this, so a three day project took a week as I had to order the adapters.  I opted for two just incase I decided to get creative again.

Step 1:  I removed the lid with the glass from the box, and taped off the top edge.  I didn't tape along the inner frame where it met the glass.  That was time consuming, and I didn't care if there was overspray on that part.

Step 2:  I cleaned the glass of fingerprints, before applying my first three coats.  I made the mistake of taking advantage of a brief sunny moment outside to apply these coats, and when I went back inside, several small insects had decided to land on the fresh paint.  I had to carefully remove those.

Step 3:  I applied several more coats to the surface.  I was ok with erring on the side of it being too thick because I was using LEDs which would send off plenty of light.

Step 4:  I reattached the lid to the box, then removed the backboard to locate the LEDs.

Step 5:  Honestly the LEDs gave me a few moments of pause.  The original LED lights came with zero instructions, and a bunch of random adapters, and cords.  Thankfully the power cord boxes provided instructions, and after a quick read through, I applied the LEDs in a single strip around the box, just inside where the backboard mounted.  I considered leaving the backboard off, but opted to instead cut a small notch in the side to run the power cord.

Step 6:  Plug in, and done.

What am I going to use this lightbox for?  I haven't decided yet, but I do like it.  The link I used suggested making a sign for it.  I think that isn't a bad idea, but it's not one that I'm likely to follow.

If you have the tools, and the space, then I'd suggest making this from scratch.  I prefer the spray paint idea better than the tracing paper, but that's my opinion.  I do like the idea of using the shadowboxes from Michaels simply because it cuts down on a few steps, the hinge means you can store items in the box when it's not in use, and because I hate painting and the box is already painted.  It's up to you.  I bought the frame at a 70 percent off sale and saved a bundle.

Lightbox part 1


Thursday, August 7, 2014

How long has it been?

As you can see, quite a blow out.
Summer seems to be the time that projects get done around here, and this summer is no exception despite my being in grad school.  This year the washing machine decided that it'd had enough and blew up.  The center tower had rusted out, and that was that.  And since we had to replace the washing machine, why not remodel the laundry room while we're at it?

This means new paint, new fixtures, new hanging cabinets, new floor, and of course, a new washing machine.

It's a rather straightforward sounding project, and we have a majority of the items on hand including the paint and the tile so with a week before the arrival of the new machine, we should be able to get the whole project completed.


The first things first, everything in the room comes out including the toilet, the shelving, old cabinets, and the shop sink.  

Next we strip the walls because we're going to paint and put up a new tile base along with the flooring.  And despite the previous owners not being solid in repair and upkeep, we are pleasantly surprised and relieved that they used greenboard in the room.  This will make life easier.


More prep work with the two machines being removed.  The big white spot was where the previous owners decided to paint around the old toilet rather than remove it to do the job correctly.  And the water hookup is quite low, so now is also a great time to move it to a more reasonable height.


A better shot of what I'm talking about above.  That outlet on the left is pressed up against the toilet which means to run water to it, we had to run to the outlets on the right with a flexible hose.  It works, but it's about as low rent as you can get.  Some drywall and plumbing work and we can make that outlet useable.


This picture was from several days later, as we prepped the room for painting.  What's transpired in between was the moving of the outlet (see above), and setting the insulation in the wall on fire.  The builders installed it backward, and while we were cutting the pipes in the walls, a spark set the paper on fire.  It was quite exciting putting it out, and that is why you should always have a fire extinguisher handy at all times.  But that excitement aside, the plumbing went quickly and we even managed to remove a massive clog.  I have my suspicions that the previous owners were heavily involved in some nefarious schemes including "cooking" based on what the clog was made of.  I believe you get my drift there.


Well it wouldn't be a Stark project without some sort of hiccup, and this project has had plenty.  We had to replace two tools - a dual action sander, and tile saw - and then just as we were prepping the floor for tiling, we noticed that it was peeling.  No big deal, we can just pull it back and cut it and is that black mold?

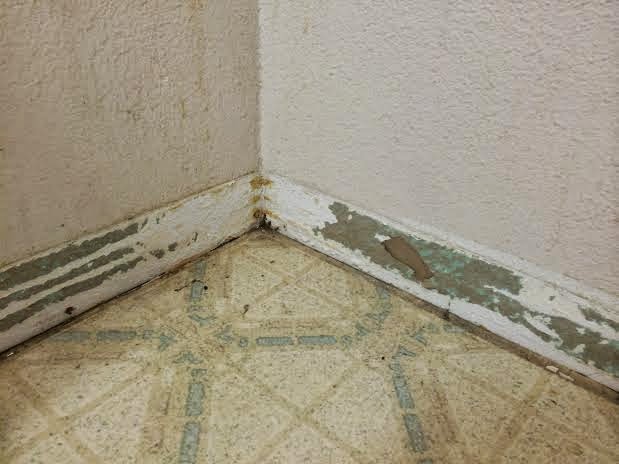
The previous owners hadn't installed the old toilet correctly, nor did they know how to install a floor.  So the toilet leaked terribly, and to counteract this, they used gallon upon gallon of glue to try and create a barrier with the old flooring.  As you can see, this doesn't work.  But it does make tearing up the old floor incredibly difficult.

This is where things stand now.  Luckily the black mold looks worse than it actually is, and we've done a great job cleaning it up.  It's nearly gone so we'll be able to install the new floor this weekend.  The room is also completely painted so all we're waiting on is the flooring and we can start putting the place back together.  And not a moment too soon since we've had to have the house opened up for ventilation, a wonderful thing when it's been 90+ outside.  I'm done with trying to go to sleep in a house that's hovering around 85.

Sunday, February 23, 2014

Still working

This project is not as easy as it would appear, though I will admit that when it comes to anything sewing related, I'm not even a novice. 

Problem 1:  Weaving the elastic.  It's a pain.  A serious pain.  Even when you've pinned down the edges and had them sewn it's not easy.

Problem 2:  Sewing the elastic.  It goes all over and even the person who helped me get the edges down had some trouble.  I solved this by using double stick tape cut in half.  I put down the tape, then applied the pieces so they stayed in relative order.  There's still a couple trouble spots, but I'm not nit picking.

Problem 3:  Stretching the elastic tight.  I resolved to use a clip board to do this.  What's the problem?  Well the backing that you're attaching the elastic to isn't exactly firm so when you pull it has a tendency to want to come with the pull.  I solved this by using a clip board and clipping down the edge I'm pulling against, then pinning the opposite edge, then sewing it up - by hand because the board gets in the way of the machine.  The results were pretty good.

Problem 4:  This was my problem, but one that you should avoid.  Use black as your backing.  I went with gray and the foam I used is showing stress mark where the foam got mangled or scratched.  Issue?  Only cosmetically.  If you care about that, use black. 

This project I figured you could knock out in two days, a day if you're really good with the machine and you don't have interruptions.  I tend to take longer on projects because I break them up, or walk away when I run into an issue rather than sit there and get frustrated.  So I'm still working, but I can see this coming together.

Will I do this project again?  Hard to say.  I think it's going to look nice, and I can tell you that the money spent is less than it would cost me to get a similar professionally made item.  I might do it again, but I think that there needs to be some modifications done.  The weaving isn't as fun as it sounds, and being the first, there's a lot of trial and error.  We'll see. 

Tuesday, February 18, 2014

The next project follow up

I've been dealt a temporary setback.  First off, I don't know how to use a sewing machine.  Secondly, the sewing machine I was going to use under careful supervision gave up the ghost as I was in the process of doing a test run.  Currently I'm waiting to hear back from a friend about the availability of her mother's machine and possible help.

But aside from that, let me catch you up.  If you haven't taken a look at the project page, here's the link again.  Rather clever if you ask me.

Securing the needed materials - until this sewing machine issue - was the biggest problem.  I went through four different thrift stores looking for a book that suited my needs.  I decided to stick with the older books for two reasons.  The first is that I like the covers better than what we have on the newer hardbound books.  Secondly, I surmised that older books would be well used books and the spines would be separated from the binding.  This proved correct.

If successful, I plan on making a second one of these so when I found some rather academic looking books that suited my needs, I grabbed all of them.  For the price of $11 dollars and some odd looks from the cashier, I am now set to do at least two.  I'm rather attached to the old engineering guide that I picked up.

Forget fabric stores.  I went, I looked, I went to Michaels and that's where I recommend you go for your materials.

I opted for heavy paper - think 4x the thickness of poster board and much stiffer.  For a second version, I think I'll spend the money - $13 rather than $7 - and get heavy matting.  The book I chose is still in good condition, but I think I'd like the extra sturdy feel of picture matting.

You will need the 9 yards of elastic.  I went with the 0.5 inch strands and have used all but some scrapes.  I also went with the neoprene backing because that was readily available.  I chose grey because I liked the look better than black on black.  They had some extra fun colors - orange and red - which I might use for the second book.  You can see the neoprene behind the elastic when done so that might be fun.


As you can see here, I've marked out the areas with what I'm going to put where.  The original has a large pocket on the right.  I'm debating doing this, or weaving in some elastic for pens or other things.  I'm going to put the iPod at the top - she put her cell phone there - and then straight elastic on the left.

The book I chose was slightly smaller than the one she used so I don't think I'll be able to get my laptop charger inside.  I don't think I'd want to in any case because of how much space that would take up.  Instead I'm opting to corral the cords I have in my bag - iPod charger, phone charger plus extention, HDMI cable - and a flash drive and ear buds.


This is where I am right now.  I've cut the lengths I need and then attached the long pieces with pins.  And then the sewing machine mishap happened, so now we're in a holding pattern.  But things are coming along nicely, and it's a project you can probably knock out in a day, maybe two.

I don't have any recommendations as of now.  I would say that you should error on the side of a book at least as large as the original if not slightly larger.  Also take into consideration the thickness of the book, and what you plan on putting inside.  One reason I chose to skip using the engineering book aside from liking it - a very clean book considering it was published in 1939 - is that it's only about 1.5" thick which can be limiting on what I can put inside if I plan on using both sides - and I do.  I would caution about using too thick of a book.  I saw an old dictionary that looked useful but the thickness - at least 3.5" - was a turn off.  Remember this should fit in a bag.

Well that's it for now.  Everything is set up and ready to go, so as soon as I hear back about a machine, we'll be off and running again.

Sunday, February 16, 2014

The next project

This will be the next project, and I've already started.  I've been sick the last couple of days, so this seems like a perfect opportunity to attempt this.  I was very picky about the books that I chose, and I got lucky and found a well loved college text book from 1947 in a bargain bin at a local thrift shop.  I managed to get three for under $12 so if one fails, I have two back ups.

I might post pictures as I go.  We'll see what happens.

Monday, November 4, 2013

Renovation: After (part 2)

The final result.

Ok so there were issues left and right when it came to finishing this house.  The two biggest headaches were the kitchen cabinets and then the wood paneling that was throughout the house.

The kitchen cabinets took gallons of stain.  Gallons.  No matter how much stain was applied, a couple of hours drying and it looked as though nothing had been done. 

The wood paneling in the house was a bigger problem.  This stuff was in the living room, dining room, and the first bedroom and had been applied directly to the wall boards so removing it without pulling down all the walls was impossible.  Instead I opted to simply paint over the walls.  I wasn't sure how I felt about this option, but pulling down 3/4 of the interior walls wasn't a viable option when it would delay everything else.  I was fairly happy with the final results. 

We did discuss replacing the kitchen tile with something more modern, but I was a fan of the retro look we achieved with the updated cabinets and appliances.  The one appliance we didn't replace was the fridge.  While it doesn't match the other appliances, it was new so replacing it seemed excessive. 

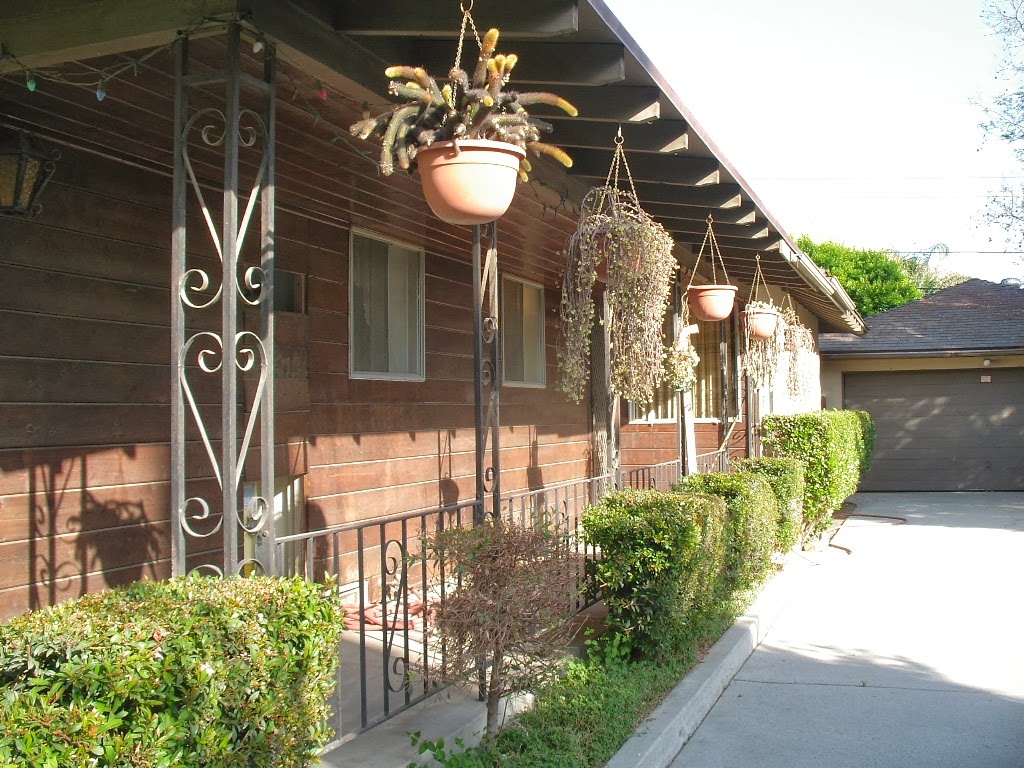
Despite turning the house into a rental property, I opted to spend the money on good flooring and carpet rather than the cheaper "rental" level flooring.  This gave us a floor that will last through several tenants without needing to be replaced.  While the majority of the house is "rental" white, we did have a little fun with the interior.  The carpet in the bedrooms and living room is a dark blue, and the built in laundry cabinet was painted a pale green to break up the long white hallway.  We installed heavy use tile in the entry way since that would get the most use, and while stainless steel is all the rage, I went with brushed nickel to minimize the amount of cleaning required - stainless is a real pain to keep clean.  We also chopped the hedges around the house to open it up a little more and ended up replacing the garage door.  And with the new windows, the A/C is capable of bringing the inside temp of the house down into the low 60's. 

Renovation: After (part 1)

6 weeks later...


Renovation: Before (part 2)

So in 2009, my sister and I renovated my father's house. 


I am going to clear up one misconception. 

Renovating a house is not fun or as much fun as you might hope it would be.  Don't fall for the Lowe's or Home Depot commercials with the happy couple, happily demolishing their home.  It doesn't go that way.  I grew up around major construction sites thanks to my family's engineering firm so I knew about delays, hidden costs, etc. and this still threw plenty of punches. 

Ok I'm not going to explain every single picture because that would be excruciatingly detailed even for me, but I'll give you a quick run down.

This house, as you can tell by the light fixture, was built in the early 1950's by my grandparents. 

They lived there until their passing and then it was handed over to my father until his untimely passing. 

As you can see from some of the pictures, not much had changed in the house since it was first built.  All the windows were single paned and leaked like a sieve.  Despite the A/C going 24/7 - Southern California summer is a lousy time to renovate - it never dropped below 90 in the house. 

We used to have massive get family dinners here so the cabinets were full of dishes. 

My father loved two things in life aside from his family.  Books and climbing.  The picture with the through and through fireplace shows a sliver of what was in the front room.  What you can't see are the massive bookshelves holding hundreds of books. 

The outside of the house was mostly taken care of - lawn mowed and water, fruit trees in the back all healthy - but there was a lot of overgrowth that needed to go. 

And the garage door wouldn't shut unless you slammed it. 

Inside we had to replace just about everything you see from flooring to appliances, lighting, fans, etc.  We also replaced the interior doors, something that sounded easy and ended up being a royal pain.  What passed as "standard" in the 1950's is far from standard now so many items that sounded simple to replace, such as the doors, were in fact more difficult than needed.  

Things to do:

*  Clear down the house
*  Deep clean house
*  Replace all windows
*  Bring electrical up to code
*  New flooring
*  Replace all fixtures
*  New appliances
*  Fix garage
*  Re-plump house
*  Clear down back yard
*  Fix roof
*  New gutters
*  Paint house - interior and exterior
*  New interior doors
*  Mend fence
*  Replace misc. items
*  Repair interior walls
*  Patch house against pests
*  New roof insulation

A pretty standard list but each item had sub items.  For example, new flooring meant removing the old flooring, replacing the padding, finding tile, laminate, and carpet, and installing.  Replace misc. items means that every knob, pull, drawer handle, everything was replaced. 

As you can see, this project is a lot bigger than it looks.  This doesn't cover all the other tasks that had to be handled while the house was being worked out.  That meant meetings with the lawyers, dealing with the estate, the other property, etc. 

This was a large project. 

Sunday, November 3, 2013

Renovation: Before (part 1)

I realize that I have neglected this blog, and so I plan to try and remedy that situation with this post.

This will be a large post that I have broken up into several posts.  This post will be nothing but pictures.  The next post will explain each of the pictures and give background.