I spent the last few days up in Port Angeles with my friend Kristin aka KK if you've checked out the blog. The majority of the time I was up there we were working on puzzles, drinking strong cups of tea or coffee, cooking for each other or spending some time outdoors but we did get into a rather heavy discussion of remodeling her house.
KK is a park ranger and she is provided government housing. I'm not sure if government housing always looks like this but this house was awesome in a very eclectic way. It reminded me a lot of my dad's place in California with multiple versions of wood paneling strewn throughout the house, some old cabinets with odd fitting doors and beautiful wood beams covered by paint. Over all it's a very charming house with new windows and appliances but it could use some work. Ok a lot of work.
Sunday night we wandered through the house, first on a tour and second a more in depth look at what she had, knocking and pressing on the wooden panels, talking excitedly about what could come down or go up, scraping corners of paint with sandpaper to find out what was underneath and in general mentally tearing the house apart to start over.
Since it is government housing there were some guidelines she needed to follow. The first was that it had to look good. The second was that this wasn't always going to be her house so there was some stuff she didn't want to invest in. Thirdly and probably more important, money and time. I told her that it's always tempting to start in the kitchen but that she should start in the bedroom or bathroom - smaller places - so she could get an idea of what renovating felt like. The last thing, the very last thing you want to do is tear something apart and realize that it's harder than you thought it was - it always is - and that you don't have the time to do it - you never do - and that you can't use the space you're currently renovating. People get divorces over renovation projects and while I'm sure her dog Coho won't leave her, renovation always sounds fun on the surface but once you get started, it doesn't always remain so. And while she is closer to town - 20 miles rather than 40 minutes - the closest Home Depot is another 20 minutes beyond Port Angeles. That puts quite a crimp in a quick run to the store if needed and Port Angeles is a unique town having no box stores like most cities/towns so you can't run to Fred Meyer or Bi-Mart in a pinch. All things that you must take into consideration.
That all being said - I think warning people before they start is a good thing - renovation can be a lot of fun especially if you've got the drive to do it. It'll also be a lot more fun when it's not 30 degrees outside but that's another story. I showed her pictures of what I did in California to my dad's place and she really liked it. I did let her know that we had some driving motivation for that house.
1. Time. I couldn't be away for a long time - 6 weeks was pushing it - so I came down and after an initial planning phase, starting in on it. And I got to dedicate whole days to what I was doing rather than working then coming home to work.
2. Good news. Everything that could have gone right for me did go right. I had a friend and my mom helping me out, keeping me sane. The inspections on the house revealed very little in the way of what needed to be done. Everything that could have and probably should have set us back didn't. The roof was in great condition, the walls were sound and the insulation was excellent, the plumbing was in good shape, the water heater simply needed to be replaced, the windows were the only source of heat/cold loss, etc.
3. Money. I had access to a ton of money so when it came to a hidden cost or needing supplies or something on the fly I simply had to pull out the wallet. I think this is the key to any renovation. You know there will be hidden costs - or you should - and you know things will take longer than expected but having the money makes it so much easier. I didn't run into a problem where things came to a stop because the money wasn't there. 8 new light fixtures, extra gallons of paint, new hardware, whatever it was, out came the wallet.
So having talked with KK about renovating her house I told her that if I don't get another job this summer, I could come up and live with her and help her renovate her house while she is at work. Despite the work and frustration from that summer, I did really enjoy working on my dad's place and looking at the pictures or having people rave about how the house looks from the before and after brings a certain amount of pride to the table.
Thursday, January 13, 2011

Wednesday, December 22, 2010
Cripes, he's gotten industrious
So noticing that my head board project is on hold till it gets warm enough to work on it again - I don't have the shop space to finish sanding and staining - I've decided to take a look at this chest that I've owned since I was a little tyke. It's not really serving any purpose other than a landing spot for a lot of tools but it used to house all my clothing, complete with pictures of what was supposed to go in each drawer. It was my mom's idea and it didn't really work that well since I wasn't exactly a laundry person and stuffed everything I could into a single drawer. That's all since changed.
What inspired me was wandering through Anthropologie with a friend yesterday looking for random Christmas gifts when I stumbled upon a rack full of knobs and handles for chests and drawers. And while the prices were a bit extreme - $8 bucks for a tiny handle! - I was thinking back to this chest and it's rather plain looking standard wooden knobs. Interesting...an idea forms. So today I decided that I would tear through this chest and empty it out of all sort of random odds and ends - it kind of became a hobby chest full of my old trains - and see if it were possible to replace the handles with something more stylish.
What inspired me was wandering through Anthropologie with a friend yesterday looking for random Christmas gifts when I stumbled upon a rack full of knobs and handles for chests and drawers. And while the prices were a bit extreme - $8 bucks for a tiny handle! - I was thinking back to this chest and it's rather plain looking standard wooden knobs. Interesting...an idea forms. So today I decided that I would tear through this chest and empty it out of all sort of random odds and ends - it kind of became a hobby chest full of my old trains - and see if it were possible to replace the handles with something more stylish.
Thursday, November 4, 2010
The Bed Frame pt. 7
It's been a very long time since I've updated this blog but that's most because I've had nothing to update it with. The bed frame has taken a back seat to coaching - as do most projects - and the weather around here certainly hasn't helped much. It's been nice the last couple of days but that's due to change soon so it's a matter of finding a way to finish up as much as I can before things get really bad outside.
The task list:
1. Sand down and apply a second coat of stain to the posts
2. Sand and stain the head board.
3. Sand and apply a second coat of stain to the head board.
Really what's slowed things down is the head board. I'm really not looking forward to trying to stain that piece with the grains of the wood running several different directions and it looking like I might need to add a couple extra pieces so I can avoid having any dark spots on the cut wood.
I've also decided to use a different brush to apply the stain and have moved over to foam brushes hoping that this will help make things a little more even. I've also considered using a rag but this stain seems to resist pretty much every solvent made to clean it up.
Hopefully next week with us moving over to winter practice where I get a little more time and things are less stressful I'll be able to knock out at least the posts and then look at designing the remaining bed parts.
The task list:
1. Sand down and apply a second coat of stain to the posts
2. Sand and stain the head board.
3. Sand and apply a second coat of stain to the head board.
Really what's slowed things down is the head board. I'm really not looking forward to trying to stain that piece with the grains of the wood running several different directions and it looking like I might need to add a couple extra pieces so I can avoid having any dark spots on the cut wood.
I've also decided to use a different brush to apply the stain and have moved over to foam brushes hoping that this will help make things a little more even. I've also considered using a rag but this stain seems to resist pretty much every solvent made to clean it up.
Hopefully next week with us moving over to winter practice where I get a little more time and things are less stressful I'll be able to knock out at least the posts and then look at designing the remaining bed parts.
Monday, September 27, 2010
The Bed Frame pt. 6
Progress. This last weekend turned out nice enough that I was able to get the posts for the head board cleaned up and managed to get the first coat of stain on.
 Sanding down the remaining swirls and odd marks on both posts
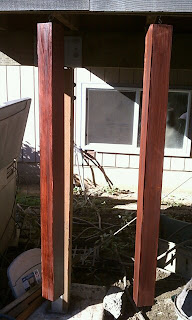 Success. The first coat of stain went on rather easily and while there are a few touch up spots I'm fairly pleased the the overall results.
 In the process of applying the stain I did manage to stain part of my foot. The shoes were old but I really liked them plus the stain turned my foot a nice shade of mahogany. The important thing though is that the posts are almost done. The head board should be completed soon and then we can move to the frame.
 Sanding down the remaining swirls and odd marks on both posts
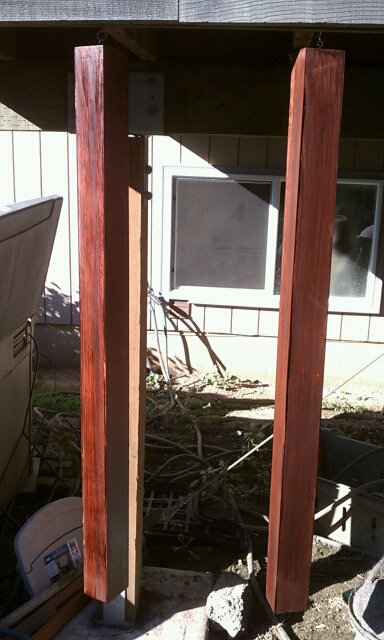 Success. The first coat of stain went on rather easily and while there are a few touch up spots I'm fairly pleased the the overall results.
  In the process of applying the stain I did manage to stain part of my foot. The shoes were old but I really liked them plus the stain turned my foot a nice shade of mahogany. The important thing though is that the posts are almost done. The head board should be completed soon and then we can move to the frame.
Tuesday, September 21, 2010
The Bed Frame pt. 5
No news on the bed frame project other than I haven't had time to work on it. Between starting fall season and the weather changing toward northwest fall - love this time of the year - I haven't had the time or energy needed to finish off the project. I'm hoping that this weekend will allow me to get more of it done.
A quick recap for those who don't want to go back through the previous four posts.
1. I couldn't find a bed frame that I liked so inspired by my friends Sonja and Chris I decided to build my own.
2. After sorting through antique malls for a door to use as the head board, I decided on old window shutters. Since the window shutters cost so much money and required a ton of prep work I decided to build my own.
3. Designed and built my own window shutters then with my stepfather's help we designed and built the frame.
4. Everything was framed up and nailed into place so we started on building the posts that will hold it in place.
5. The posts were build, cut down leaving sanding and staining.
And that's where we stand right now. The bed posts need a little more sanding to remove the last swirl marks and then the head board needs to be lightly sanded. Then comes staining and it's looking like two coats will probably be needed. Finally will be the remaining frame which is still in the design phase. The important thing is to make sure that it's sturdy yet easy to disassemble for ease of moving. It's always nice having an engineer in the family.
Anyhow that's where things are right now. Zero forward progress but we're almost there.
A quick recap for those who don't want to go back through the previous four posts.
1. I couldn't find a bed frame that I liked so inspired by my friends Sonja and Chris I decided to build my own.
2. After sorting through antique malls for a door to use as the head board, I decided on old window shutters. Since the window shutters cost so much money and required a ton of prep work I decided to build my own.
3. Designed and built my own window shutters then with my stepfather's help we designed and built the frame.
4. Everything was framed up and nailed into place so we started on building the posts that will hold it in place.
5. The posts were build, cut down leaving sanding and staining.
And that's where we stand right now. The bed posts need a little more sanding to remove the last swirl marks and then the head board needs to be lightly sanded. Then comes staining and it's looking like two coats will probably be needed. Finally will be the remaining frame which is still in the design phase. The important thing is to make sure that it's sturdy yet easy to disassemble for ease of moving. It's always nice having an engineer in the family.
Anyhow that's where things are right now. Zero forward progress but we're almost there.
Monday, September 6, 2010
The Bed Frame pt. 4
When we last left our hero he'd just completed assembly of the head board and was now moving into darker - literally - dangerous waters. Sanding and staining. Proper sanding and staining are critical and can be time consuming. This is not where you want to start cutting corners. It'd be a damn shame to have put this much time and money - albeit little money - into your bed just to ruin it because you get impatient. Take the time and you will be rewarded. The stain otherwise known as "Bombay Mahogany." Fancy name for dark red I suppose. This is the test piece sanded and prepped. Not a bad color but a second coat will definitely help.
 This is one of the two posts that will support the head board. They're made from four boards glued together then cut down.
 Sanding is definitely not one of my favorite things in the world. Thankfully I found this little gadget that I bought for the renovation project I did at my dad's place in California. The good news is that it cuts sanding time by half. The bad news is that it creates a ton of sawdust that gets everywhere
. Like I said, everywhere. The result of sanding one half - yes half - of a bed post. The pile was a lot bigger once I was done with a single post but cameras and sawdust don't mix. I managed to get both posts nearly done although there are some swirl spots from the bench saw that will have to be worked on. Next up, the head board.
 The stain otherwise known as "Bombay Mahogany." Fancy name for dark red I suppose. This is the test piece sanded and prepped. Not a bad color but a second coat will definitely help.
 This is one of the two posts that will support the head board. They're made from four boards glued together then cut down.
 Sanding is definitely not one of my favorite things in the world. Thankfully I found this little gadget that I bought for the renovation project I did at my dad's place in California. The good news is that it cuts sanding time by half. The bad news is that it creates a ton of sawdust that gets everywhere
.
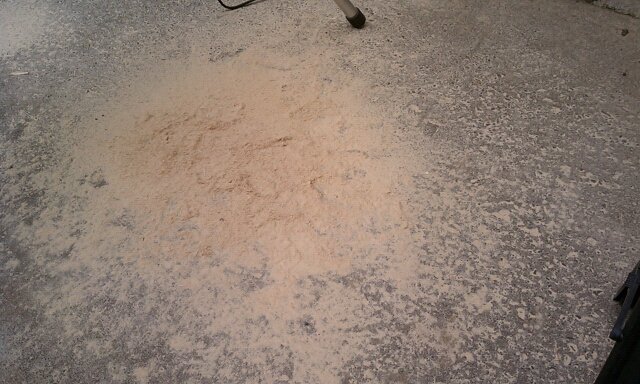 Like I said, everywhere. The result of sanding one half - yes half - of a bed post. The pile was a lot bigger once I was done with a single post but cameras and sawdust don't mix. I managed to get both posts nearly done although there are some swirl spots from the bench saw that will have to be worked on. Next up, the head board.
 Saturday, September 4, 2010
The Bed Frame pt. 3
It's Labor Day weekend and I've definitely lived up to the name. Taking advantage of one of my few remaining free weekends - fall season starts Tuesday - I got the rest of the bed frame sketched out and put together the head board.
 The cap and bottom piece for the head board on the left and center of the picture. I wasn't sure what to do about the posts so my step-dad suggested that we build our own so they match the rest of the frame. That's the pile on the right.
 Life is so much easier when you've got the right tools.
 The nearly finished product. The posts will go on either side of the outer shutters. All that's left is to fill in any flaws, sanding then stain. Next up is the frame.
 The cap and bottom piece for the head board on the left and center of the picture. I wasn't sure what to do about the posts so my step-dad suggested that we build our own so they match the rest of the frame. That's the pile on the right.
  Life is so much easier when you've got the right tools.
 The nearly finished product. The posts will go on either side of the outer shutters. All that's left is to fill in any flaws, sanding then stain. Next up is the frame.
Subscribe to:
Posts (Atom)